The header of your WP Engine website is customizable using Astra, giving you the option to change the menu, site title, logo, and search location.
You can access the Header Builder in Astra two ways:
- In the Dashboard, click on Astra in the sidebar menu on the left and go to Header Builder.
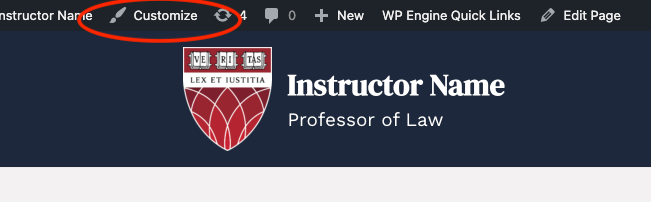
- When logged into WP Engine, go to the homepage of your website and click Customize in the black WordPress bar up top. Then, in the menu to the left, choose Header Builder.
Once in the Header Builder, you’ll see a panel on the left with options to edit Site Title & Logo, Search, Off-Canvas Menu (i.e. mobile menu), and Primary menu. At the bottom, there’s a wireframe, called the Visual Header Builder, showing the placement of each header element.
Editing Site Title and Logo
Click into the Site Title and Logo section. In the General tab, you can remove or replace the HLS shield or your organization’s logo, or use the slider to change the size of the logo. There are also fields to change the title and tagline in your header. (Note: Changing the site title will not change the URL.)
In the Design tab, you can set the content in your header to full width (i.e. the text will span the full width of the viewport, rather than the width of the content, which is the default setting). Below that, there are fields to add margins around the headers.
As you make changes, you will see them previewed to the right, but you must click Publish for your changes to apply.
Editing Menus and Search
The Off-Canvas Menu section refers to the primary menu as it appears in mobile. If you do not alter these settings, they will display the same pages as your primary navigation. You can add or remove pages from the Off-Canvas Menu by clicking into the section and going to Configure Menu from Here. Then, go to Edit Menu under the Off-Canvas Menu dropdown, and from there add, remove or re-order the pages.
One example of why you might want to edit your mobile menu is if you have a page that is exclusively for mobile users (e.g. one accessible by QR code) and you want to include it. Another example is if you have a page that is not accessible for mobile users and you want to exclude it.
To edit the Primary Menu, click on that section and go to Configure Menu from Here. Under Primary Menu, click Edit Menu. You can drag pages to reorder them or click Reorder. Click Add Items to add pages to the menu.
To add a page to the primary menu that is not on the site, click the Custom Links option at the top, and just enter the URL and anchor text.
You can create sub-items in the Primary Menu by dragging the item you want to make a sub down and slightly to the right of the item to be its parent. For instance, if you wanted to make Bibliography a sub item of About, just add Bibliography to the Main Nav, then drag Bibliography to just beneath About and move it slightly to the right.
Rearranging Header Elements
The wireframe, or Visual Header Builder, at the bottom of the page has three horizontal bars, and each bar has a left, center, and right section. The middle bar refers to the colored/imagery header section, while the bars above and below it refer, respectively, to sections above and below the colored/imagery section.
Elements within the wireframe can be easily dragged and dropped to new locations. A preview of changes will automatically appear so you can preview changes, but you will need to click Publish in the upper left corner for changes to go live.
By default, your site may have all header content (i.e. title, subtitle, logo, menu, and search) within the colored/imagery bar. Here are some examples of sites with other configurations:
- Title and logo above imagery bar, menu below
- Menu below navy header, search within header
- Title, logo, and menu below imagery bar
- Left-aligned menu below header
Rearranging items may necessitate changing text or background colors so you have sufficient color contrast. For instance, in the example here, moving the menu, which has white text, from the navy header to the light body will render it illegible.
To change the text color, click into the Primary Menu section (you can do this in the wireframe or the Header Builder) and go to the Design tab. Scroll down a bit, and go to Menu Color > Text/Link where you’ll see three circles. The first is the default color of menu links, while the second is the color on hover and the third is the color of an active link (i.e. the link to the page a user is currently on).
Change all link colors, including hover and active, so there is sufficient color contrast between the text and background. You can choose from pre-set colors or get color values from the HLS Style Guide.
Have more questions? Here are some documentation articles from Astra:
You can also reach out to the Comms office via ServiceNow with any questions.